创建微服务工程
使用sofast框架进行微服务开发有两种模式:
- 使用源码工程进行开发【不再推荐使用】
- 基于so-fast-cloud-dependencies依赖管理进行开发【推荐】
基于so-fast-cloud-dependencies依赖开发
不需要下载工程源码框架,直接创建工程并添加maven依赖,即可轻松使用sofast框架进行微服务开发。
配置maven依赖
在maven配置文件settings.xml中添加私服认证配置
<server>
  <id>sofast-proxy</id>
  <username>ntt-read</username>
  <password>(Nttdata)</password>
</server>
创建工程
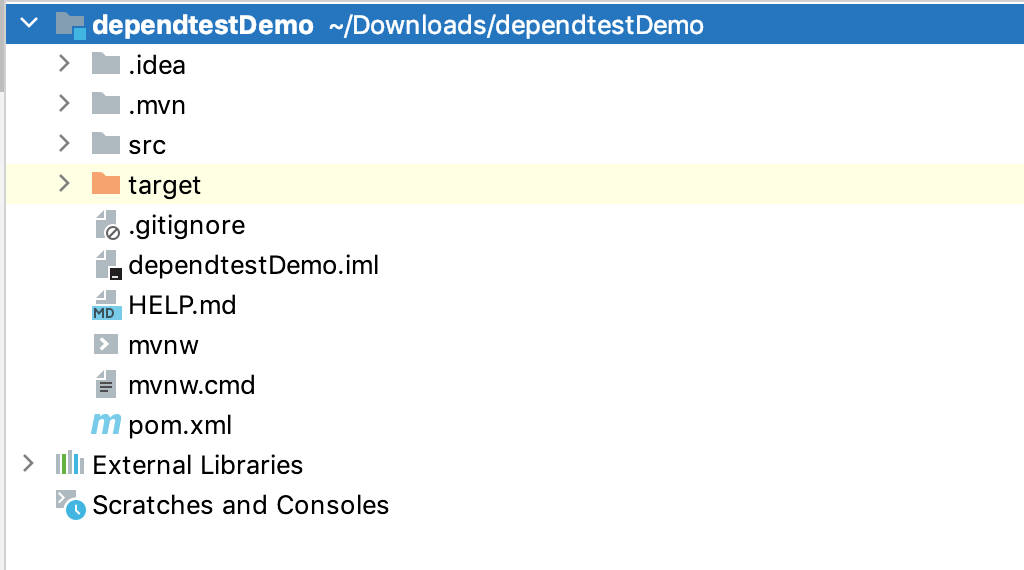
使用intellij idea创建一个maven工程,例如:dependtestDemo

Maven依赖
<?xml version="1.0" encoding="UTF-8"?>
<project xmlns="http://maven.apache.org/POM/4.0.0" xmlns:xsi="http://www.w3.org/2001/XMLSchema-instance"
         xsi:schemaLocation="http://maven.apache.org/POM/4.0.0 https://maven.apache.org/xsd/maven-4.0.0.xsd">
    <modelVersion>4.0.0</modelVersion>
    <groupId>com.example</groupId>
    <artifactId>demo</artifactId>
    <version>0.0.1-SNAPSHOT</version>
    <name>demo</name>
    <description>Demo project for Spring Boot</description>
    <properties>
        <java.version>1.8</java.version>
    </properties>

   <!-- 配置sofast 依赖管理 -->
    <dependencyManagement>
        <dependencies>
            <dependency>
                <groupId>com.sofast.cloud</groupId>
                <artifactId>so-fast-cloud-dependencies</artifactId>
                <version>2.2.0.RELEASE</version>
                <type>pom</type>
                <scope>import</scope>
            </dependency>
        </dependencies>
    </dependencyManagement>

    <dependencies>
          <!-- rest api开发依赖包 -->
        <dependency>
            <groupId>com.sofast.cloud</groupId>
            <artifactId>so-fast-web-starter</artifactId>
        </dependency>
    </dependencies>

    <!-- maven插件配置 -->
    <build>
        <resources>
            <resource>
                <directory>src/main/resources</directory>
                <filtering>true</filtering>
            </resource>
        </resources>

        <plugins>
            <plugin>
                <groupId>org.apache.maven.plugins</groupId>
                <artifactId>maven-compiler-plugin</artifactId>
                <version>3.2</version>
                <configuration>
                    <source>${java.version}</source>
                    <target>${java.version}</target>
                    <encoding>UTF-8</encoding>
                </configuration>
            </plugin>
        </plugins>
    </build>


    <!-- 环境区分 -->
    <profiles>
        <profile>
            <id>dev</id>
            <activation>
                <activeByDefault>true</activeByDefault>
            </activation>
            <properties>
                <profileActive>dev</profileActive>
            </properties>
        </profile>
        <profile>
            <id>test</id>
            <properties>
                <profileActive>test</profileActive>
            </properties>
        </profile>
        <profile>
            <id>prod</id>
            <properties>
                <profileActive>prod</profileActive>
            </properties>
        </profile>
    </profiles>

    <!--指定代理私服镜像-->
    <repositories>
        <repository>
            <id>sofast-proxy</id>
            <url>http://101.133.164.217:8091/repository/maven-public/</url>
            <snapshots>
                <enabled>true</enabled>
                <!--快照更新策略-->
                <updatePolicy>always</updatePolicy>
            </snapshots>
        </repository>
    </repositories>

</project>
配置hosts
在开发时,为了防止因服务器IP变更而导致maven私服地址变化,特意通过hosts配置了IP和私有域名的映射。
配置如下(hosts文件位置:linux在/etc/hosts;windowns在C:¥¥Windows¥System32¥drivers¥etc¥hosts
101.133.164.217 so-fast
101.133.164.217 sofast.com
101.133.164.217 maven.sofast
然而,现在域名服务商在逐步禁止私有域名的使用,因此,后续版本我们将取消hosts配置,直接使用IP地址的方式, 开发人员遇到无法访问时,可将pom.xml中的sofast-proxy标签对应的域名换成上述的ip地址。
新建启动文件
创建启动文件XxxApplication.java
/**
 * xx业务服务
 * @Description: TODO
 * @Date : 2021/6/17 18:53 PM
 * @Author : NCIT
 */
@EnableSwagger2
@EnableSolFeign
@EnableDiscoveryClient
@SpringBootApplication(exclude = DruidDataSourceAutoConfigure.class)
public class XxxApplication {
    public static void main(String[] args) {
        SpringApplication.run(XxxApplication.class, args);
    }
}
@EnableSwagger2 表示要启用swagger api,swagger的扫描路径需要在bootstrap.yml中进行配置
@EnableSolFeign 表示要启用Feign,默认扫描路径为「com.sofast.cloud」,如果自定义包路径,请配置basePackages参数
@EnableDiscoveryClient:服务发现客户端
@SpringBootApplication(exclude = DruidDataSourceAutoConfigure.class) 表示不使用默认的Druid数据源加载,启用sofast框架自定义动态数据源配置
常规微服务需要同时开启以上4个注解。
注意:sofast中使用的orm框架为mybatis-plus,默认的mapper接口扫描路径为:@MapperScan({"com.sofast.cloud..mapper."}),如果自定义开发时,创建了其他前缀包名,请在启动文件配置自定义MapperScan路径,包名规划请尽可能遵守sofast框架规范,减少参数设置
开发
创建目录结构以及开发,请参照开发规范,并推荐使用代码生成器直接进行通用代码框架生成,详细请参照下一章节代码生成器
配置文件
│   │   └── resources
│   │       ├── application-dev.yml
│   │       ├── application-test.yml
│   │       ├── application-prod.yml
│   │       ├── banner.txt
│   │       ├── bootstrap.yml
│   │       ├── i18n
│   │       │   ├── messages.properties
│   │       │   └── messages_zh_CN.properties
│   │       ├── logback.xml
resources目录下需要包含以下资源相关文件
application-xxx.yml是各环境的自定义配置,需要开发者自行修改(目前所有配置文件均迁移到nacos配置中心)
bootstrap.yml是通用配置文件,一般情况无需修改
i18n是国际化资源文件
logback.xml是日志打印配置文件
添加bootstrap.yml配置文件【必要文件】
# 修改为自己服务的端口号
server:
  port: 9044
spring:
  application:
    name: @artifactId@
  profiles:
    active: @profileActive@

  cloud:
    nacos:
      discovery:
        # 服务注册地址
        server-addr: ${NACOS_HOST:localhost}:${NACOS_PORT:8848}
        group: SO_FAST_GROUP
      config:
        # 配置中心地址
        server-addr: ${spring.cloud.nacos.discovery.server-addr}
        # 配置文件格式
        file-extension: yml
        # 共享配置
        group: SO_FAST_GROUP
        shared-configs[0]:
          data-id: application-${spring.profiles.active}.${spring.cloud.nacos.config.file-extension}
          group: SO_FAST_GROUP
          refresh: true

#swagger配置(修改为自己的包名)
swagger:
  basePackage: com.sofast.cloud.test.demo

# 利用info端点,加入版本等信息(需要在pom中配置一下信息才可以使用)
#info:
#  versin: @project.version@
#  name: @project.artifactId@
#  group: @project.groupId@
#  description: @project.description@
#  #还可以自定义信息
#  author: NCIT.1SOL
下面对application-dev.yml 配置详细介绍:
########### 本地开发用环境 ###############

# 数据源配置
spring:
  datasource:
    type: com.alibaba.druid.pool.DruidDataSource
    driverClassName: com.mysql.cj.jdbc.Driver
    druid:
      webStatFilter:
        enabled: true
        exclusions: "*.js,*.woff,*.woff2,*.gif,*.jpg,*.png,*.css,*.ico,/druid/*,/v2/api-docs,/swagger*,/error_404"
      statViewServlet:
        enabled: true
        # 设置白名单,不填则允许所有访问
        allow:
        url-pattern: /druid/*
        # 控制台管理用户名和密码
        login-username: sofast
        login-password: sofast

    dynamic:
      druid:
        # 初始连接数
        initialSize: 5
        # 最小连接池数量
        minIdle: 10
        # 最大连接池数量
        maxActive: 20
        # 配置获取连接等待超时的时间
        maxWait: 60000
        # 配置间隔多久才进行一次检测,检测需要关闭的空闲连接,单位是毫秒
        timeBetweenEvictionRunsMillis: 60000
        # 配置一个连接在池中最小生存的时间,单位是毫秒
        minEvictableIdleTimeMillis: 300000
        # 配置一个连接在池中最大生存的时间,单位是毫秒
        maxEvictableIdleTimeMillis: 900000
        # 配置检测连接是否有效
        validationQuery: SELECT 1 FROM DUAL
        testWhileIdle: true
        testOnBorrow: false
        testOnReturn: false
      filter:
        stat:
          enabled: true
          # 慢SQL记录
          log-slow-sql: true
          slow-sql-millis: 1000
          merge-sql: true
        wall:
          config:
            multi-statement-allow: true
      datasource:
        # 主库数据源
        master:
          url: jdbc:mysql://ncit.media.com:3306/tenant-sf-system?useUnicode=true&characterEncoding=utf8&zeroDateTimeBehavior=convertToNull&useSSL=true&serverTimezone=GMT%2B8
          username: ENC(ZXWwnvHQB6JFW3vLii1p4U1VlYUuENL1szoreuhoqaAbmEKSDbtzqk7OHoimwWkDWJOtqzVx78eEg0wAmCuVRg==)
          password: ENC(XwwjMe4aUDTGR/OfIh5PXHvWlSDI7zVinVUNu3Wgjl0nUvcWarN1WnG/zmXIVifjd/v8yi33Mo0pytU2o7222w==)
        # 从库数据源

  redis:
    # 地址
    host: ncit.media.com
    port: 6379
    # 密码
    password: Ncit2017
    # 连接超时时间
    timeout: 15s
    jedis:
      pool:
        # 连接池中的最小空闲连接
        min-idle: 3
        # 连接池中的最大空闲连接
        max-idle: 10
        # 连接池的最大数据库连接数
        max-active: 50
        # #连接池最大阻塞等待时间(使用负值表示没有限制)
        max-wait: -1ms
    database: 6

  # 服务模块
  devtools:
  restart:
    # 热部署开关
    enabled: true

#mybatis-plus配置
mybatis-plus:
  # 自定义xml文件路径
  mapper-locations: classpath*:mapper/**/*Mapper.xml
  # MyBaits 别名包扫描路径,通过该属性可以给包中的类注册别名,注册后在 Mapper 对应的 XML 文件中可以直接使用类名,而不用使用全限定的类名(即 XML 中调用的时候不用包含包名)
  type-aliases-package: com.sofast.cloud.**.entity, com.sofast.cloud.**.domain.**
  # mybatis执行器 该执行器类型会复用预处理语句(PreparedStatement)
  executor-type: reuse

  # 控制台打印sql
  configuration:
    log-impl: org.apache.ibatis.logging.stdout.StdOutImpl

  global-config:
    #是否控制台 print mybatis-plus 的 LOGO
    banner: false

    db-config:
      select-strategy: not_null
      # 逻辑删除配置
      logic-delete-value: 1
      logic-not-delete-value: 0
      logic-delete-field: deleteFlg


#安全配置
sofast:
  log:
    operator:
      # 配置审计日志的拦截范围
      types: insert,update,delete

# 防止XSS攻击
xss:
  # 过滤开关
  enabled: false
  # 排除链接(多个用逗号分隔)
  excludes:
  # 匹配链接
  urlPatterns: /*
数据库、redis请修改为自己的服务器地址
mybatis-plus的配置,也请根据自己的包路径进行对应修改
启动服务
在启动服务之前,请先保证nacos已经正确运行。
直接使用IDE启动为服务,或者使用maven打包后,使用命令启动服务,观察nacos中服务是否注册成功。
通过该链接http://localhost:9044/doc.html 可以查看swagger api doc。
常见问题
1.关于数据源
sofast框架默认使用动态数据源插件,因此在启动类上,我们需要排除默认的DruidDataSourceAutoConfigure配置类,而使用动态数据源插件携带的配置类;在配置文件中,必须按照动态数据源的配置方式,配置jdbc连接,否则启动会报错。
如果该微服务中不需要连接数据库和redis,那么请在pom.xml文件中将数据库依赖包排除。例如:
<dependency>
    <groupId>com.sofast.cloud</groupId>
    <artifactId>so-fast-web-starter</artifactId>
    <exclusions>
        <!-- 排除数据库 -->
        <exclusion>
            <groupId>com.sofast.cloud</groupId>
            <artifactId>so-fast-mybatis-starter</artifactId>
        </exclusion>
        <!-- 排除数据库 -->
        <exclusion>
            <groupId>com.sofast.cloud</groupId>
            <artifactId>so-fast-ds-starter</artifactId>
        </exclusion>
        <!-- 排除redis -->
        <exclusion>
            <groupId>com.sofast.cloud</groupId>
            <artifactId>so-fast-redis-starter</artifactId>
        </exclusion>
    </exclusions>
</dependency>
2.关于微服务路由配置
微服务开发完成后,需要通过网关进行统一转发访问,生产环境不允许直接暴露微服务端口;但是在本地开发时,可以直接访问微服务api。
不通过网关代理,在微服务中是无法获取token及用户信息的,因此只能作为本机开发调试使用。
测试和生产环境,需要在gateway中配置动态路由,才可以通过网关来访问微服务,动态路由的配置可以参考网关中的示例。
3.关于审计日志
sofast框架默认提供了审计日志模块,通过数据库来记录日志信息,如果要使用该功能,那么需要在需要记录日志的方法上添加如下注解:
@LogOperator(title = "请填写方法的描述信息", type = Constants.SELECT_OPERATOR)
该注解有两个必填参数,一个title,是描述这个方法是做什么的,一个type,是标示这个方法的类别(类别有6种:增删改查,上传和下载)
4.关于swagger
sofast框架默认提供swagger api doc,需要在启动类上加入注解@EnableSwagger2,以及在bootstrap.yml文件中配置扫描的包路径
#swagger配置(修改为自己的包名)
swagger:
  basePackage: com.sofast.cloud.test.demo
服务启动后,通过http://ip:port/doc.html 地址就可以访问swagger
